 |
 |
|
 |
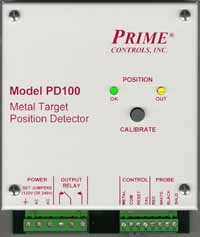
PD100 Position and Missing Part Detector
Prime’s Model PD100 Single Probe Position Detector is a unique detector that solves many application problems that proximity sensors are unable to accomplish.
1.Unlike a proximity sensor, it detects ferrous metal through any metal in the foreground. It’s output responds only when metal is at or over the calibrated thickness, up to 1.5 mm (.060” ) maximum.
2. It is used to monitor the return position of a ferrous metal part to within .025 mm (.001”) The metal must effect a magnetic field.
Maintains stability up to a maximum temperature of 90 degrees C.
Remote sensitivity calibration for harsh locations
|
|
| |
| Single Probe - Double Metal Sheet Detector |
Features
- Senses through foreground metal to 50% of max thickness
- Detection range 6 mm maximum
- Automatic Setup identifies probe type
- Responds to part detection in 3 mS to 21 mS
- Maximum metal thickness 1.5 mm with Model PM15 probe
- Quick connect terminals for fast replacement and to reduce downtime
- Push-button calibration instantaneously sets reject threshold and adjusts signal for metal
- Rejects a part not in position within .025 mm (.001”)
- Diagnostic warning alternately blinking lights for error and probe failure, fail safe output
- Power Input configures to 120 or 240 VAC @ 50-60 Hz for international application
- Contact relay output rated at 10 AMPS (½ HP) @240 AC Volts , 8 AMPS @24 VDC.
|
 |
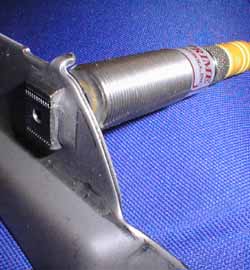
Detecting screw insert through steel back |
 |
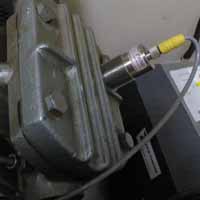
Simulated picture monitoring piston position.
This is not an actual application. |
|
To calibrate, simply insert the acceptable metal part in front of the probe, then push the calibrate button.
The detector automatically sets the accept threshold at the calibrate value or greater. It’s form “C” contact relay remains de-energized if the metal is less than calibrated, power is lost, or a probe failure is detected. An additional PNP transistor output is on when any metal is in proximity.
This output is used to verify a ferrous metal part is present. The Model PD100 detector has fault detection that immediately analyzes any problem and operates a flashing Green and Amber lamp sequence that directs the operator to the problem through reference codes. |
Power input: |
Configurable 120 Volts maximum or 240 Volts AC maximum, 50 to 60 Hz, 300 milliamps operating load |
| Output Response |
< 10 milliseconds |
| Outputs: |
Single Pole Double Throw contact relay Double detected, NC closed Max. load 10 Amps @ 240 V ac, 8 Amps @ 24 V dc ½ HP @ 240 V ac |
| Single Present Output: |
PNP transistor Nothing detected single = 24 V dc nothing = 0 V dc load source 24 Volts, 100 milliamp max. |
| Output fail Safe: |
Contact goes to double condition. PNP changes to nothing condition. Flashing indicators sequence code identify problems. |
| Metal Sensitivity: |
Ferrous metal, steel, tinplate Thickness range: 04 mm to 1.5 mm (.002” to .060”) |
| Calibration: |
Push-button switch with single sheet |
| Sample Indicators: |
Green for single, amber for double, green blinking probe is bad or disconnected |
| External inputs: |
Calibrate & output latched reset |
| Sensor Operation: |
Permanent magnetic flux field is shunted across sensor poles by the thickness of metal. Maximum thickness is limited by the diameter of the probe. The chart below provides a range for each probe. |
|
Probe Model |
Probe Diameter |
Retract Force Perpendicular, Shear** |
Min. Thickness |
Max. Thickness |
Max. Cal. Distance* |
| PM4 |
18 mm (.7") |
P= .9gs, S=<.5kgs |
.04 mm (.0015") |
.4 mm (.015") |
0.6 mm (0.024") |
| PM10 |
30 mm (1.18") |
P=4.5kgs, S=1.4kgs |
.1 mm (.004") |
1.0 mm (.040") |
1.5 mm (0.06") |
| PM15 |
36 mm (1.85") |
P=9kgs, S=3.6kgs |
.15 mm (.006") |
1.5 mm (.060") |
2.0 mm (0.08"") |
convert lbs = kg x 2.2
* Max. Cal. Distance is the maximum range of the sensor.
** Shear breakaway is parallel to blank and pivots on edge. |
|
 |

